There are a few steps to get PlanningPoker and your instance of JIRA talking to each other. First, we’ll add the ability in JIRA to listen to planningpoker.com and then we are going to authorize your account to send updates to your JIRA instance.
Before you start
This process takes around 5-7 minutes to complete and goes pretty smoothly if you have your JIRA instance open in one tab and the PlanningPoker screen with the JIRA Integration details in another.
Steps 1 – 8 will need to be completed by a JIRA admin. If you are not an admin of your JIRA instance please share these instructions and your integration details with them. They only need to be completed once per Jira instance; if other users from your organization join PlanningPoker.com, they should skip Steps 1 – 8 and go straight to Step 9.
From your JIRA instance
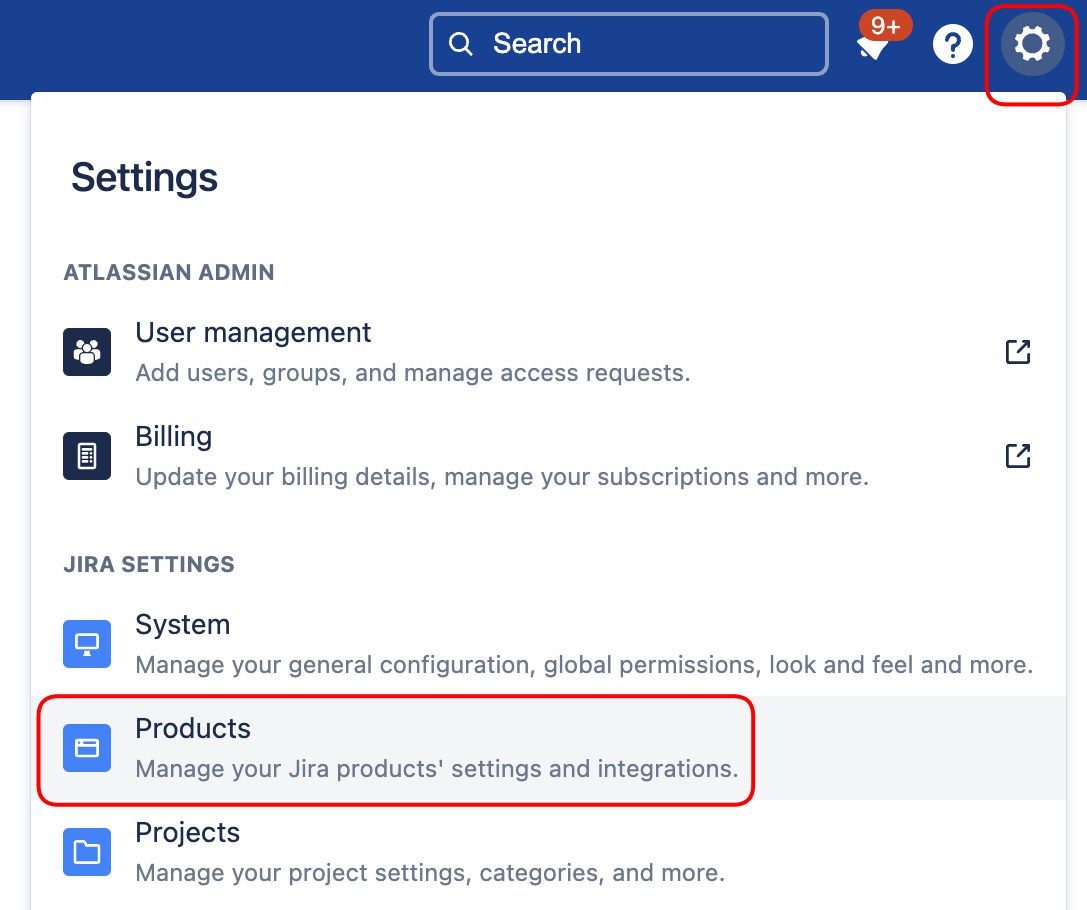 Step 1 – From your JIRA System Dashboard, click the Gear icon in the upper right corner. Click Products in the dropdown navigation.
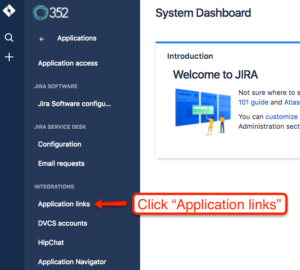 Step 2 – Click Application Links in the left side navigation.
Step 3 – Type the Application URL from your PlanningPoker integration settings page and click Create link. Select the ‘Direct’ type.
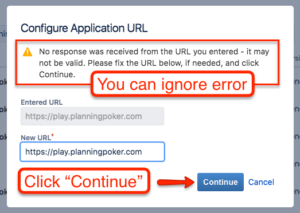 Step 4 – Click Continue in the modal. If it says there is no response do not worry and continue with the integration.
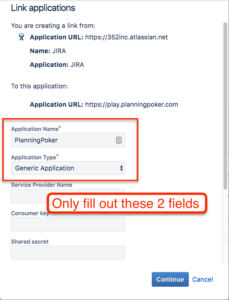 Step 5 – Enter in the Application Name as ‘PlanningPoker’ and leave the Application Type as ‘Generic Application.
Step 6 – Edit the new application Link by clicking the … icon.![]()
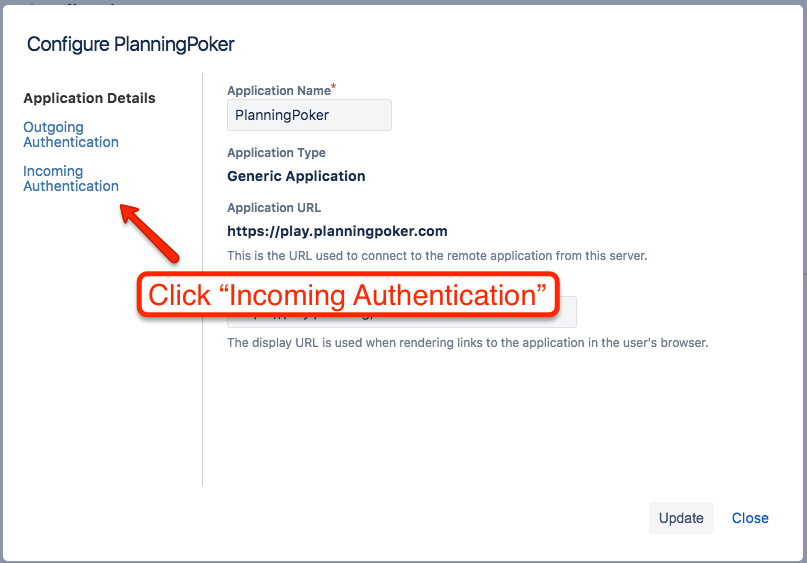
Step 7 – Click Incoming Authentication
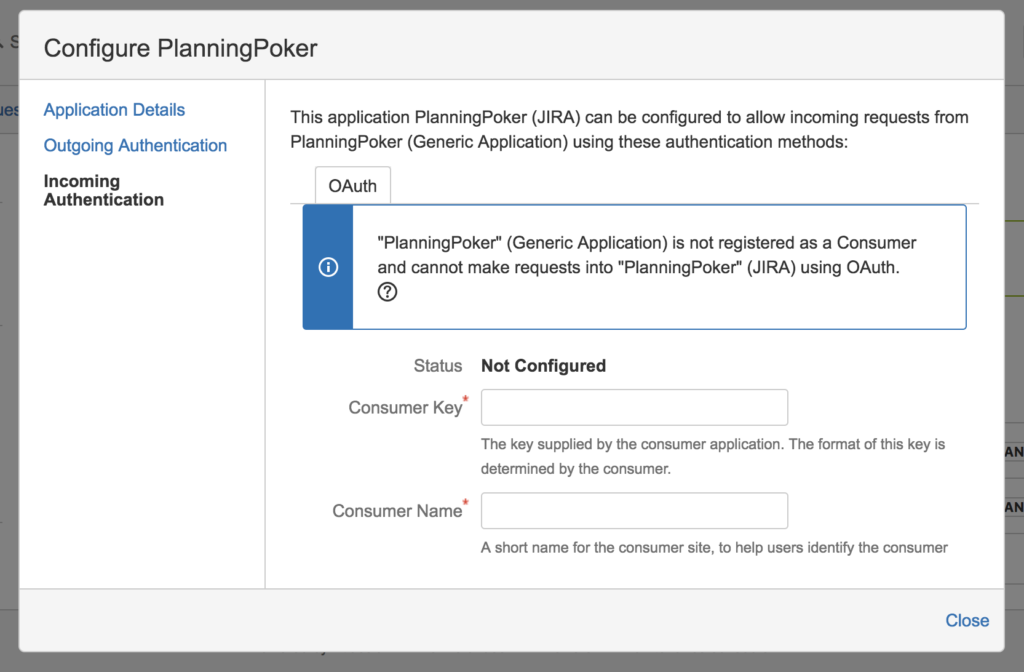
Step 8 – Add your integration details from PlanningPoker (found in your integration settings page) in the corresponding fields in the modal. Remember to scroll down in the modal to get to all the fields and to click Save.
Now you’re are all done with JIRA but there are two last steps to complete in PlanningPoker.
From PlanningPoker.com’s integration page
Step 9 – Type your Host Name and press Link on the PlanningPoker integration settings page.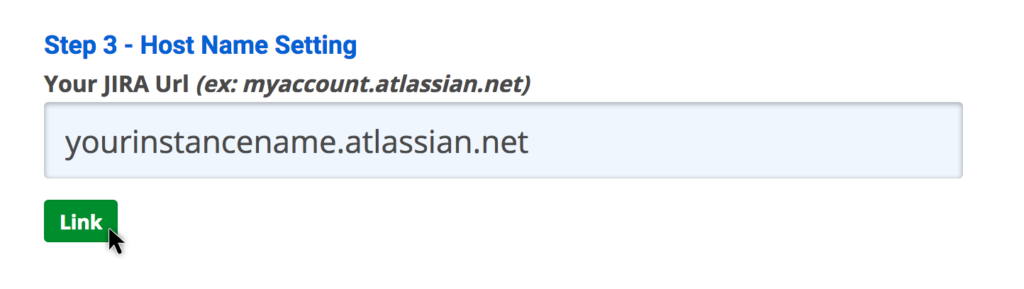
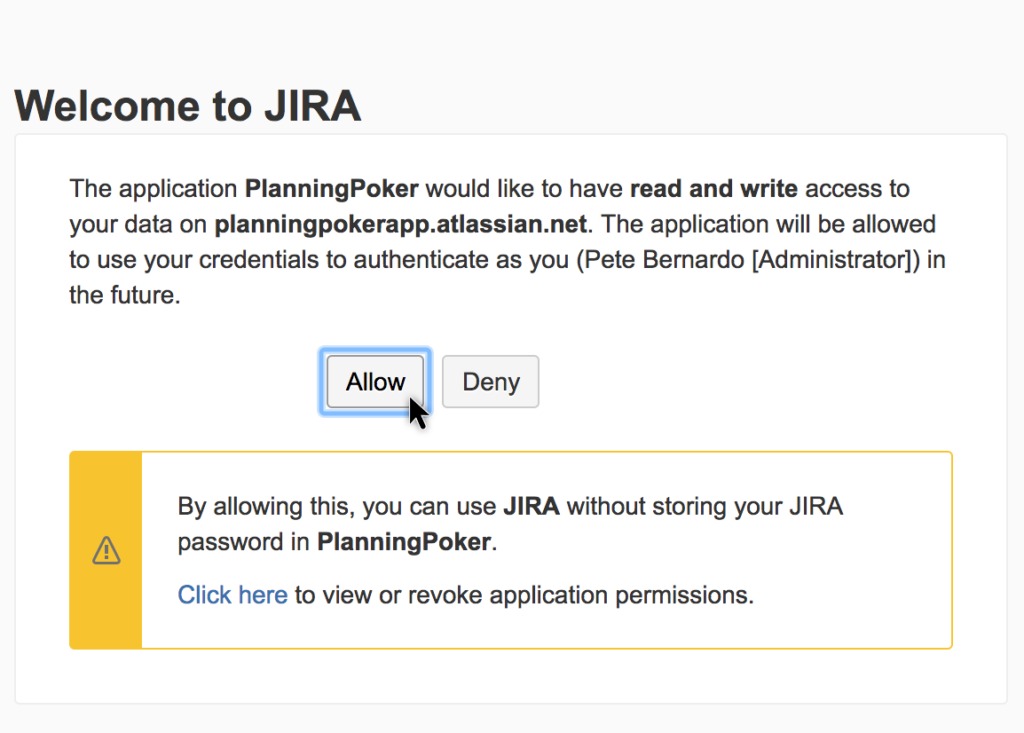 Step 10 – Press Authorize PlanningPoker and then Allow in the window that then pops up.
Now you’re done! When you create a new game, you’ll be able to import stories from JIRA. Optionally, you can configure the points from your planning sessions to sync back to JIRA automatically. Here are the instructions to import stories when creating a game with the integration.